Component Library Guide
The Component Library is where you manage control units, sensors, and connectors. By adding your component details here, Wiringly can handle the boring stuff like generating parts lists and tracking pin orders for you.
Admin-created components are available to everyone as a starting point. While you can't change the originals, you can easily copy and tweak them to fit your specific needs in seconds.
Looking for preconfigured connector maps, dimensions, and pin diagrams for motorsport parts? You can browse our complete public Component Library Pinouts to view exact pinout assignments.
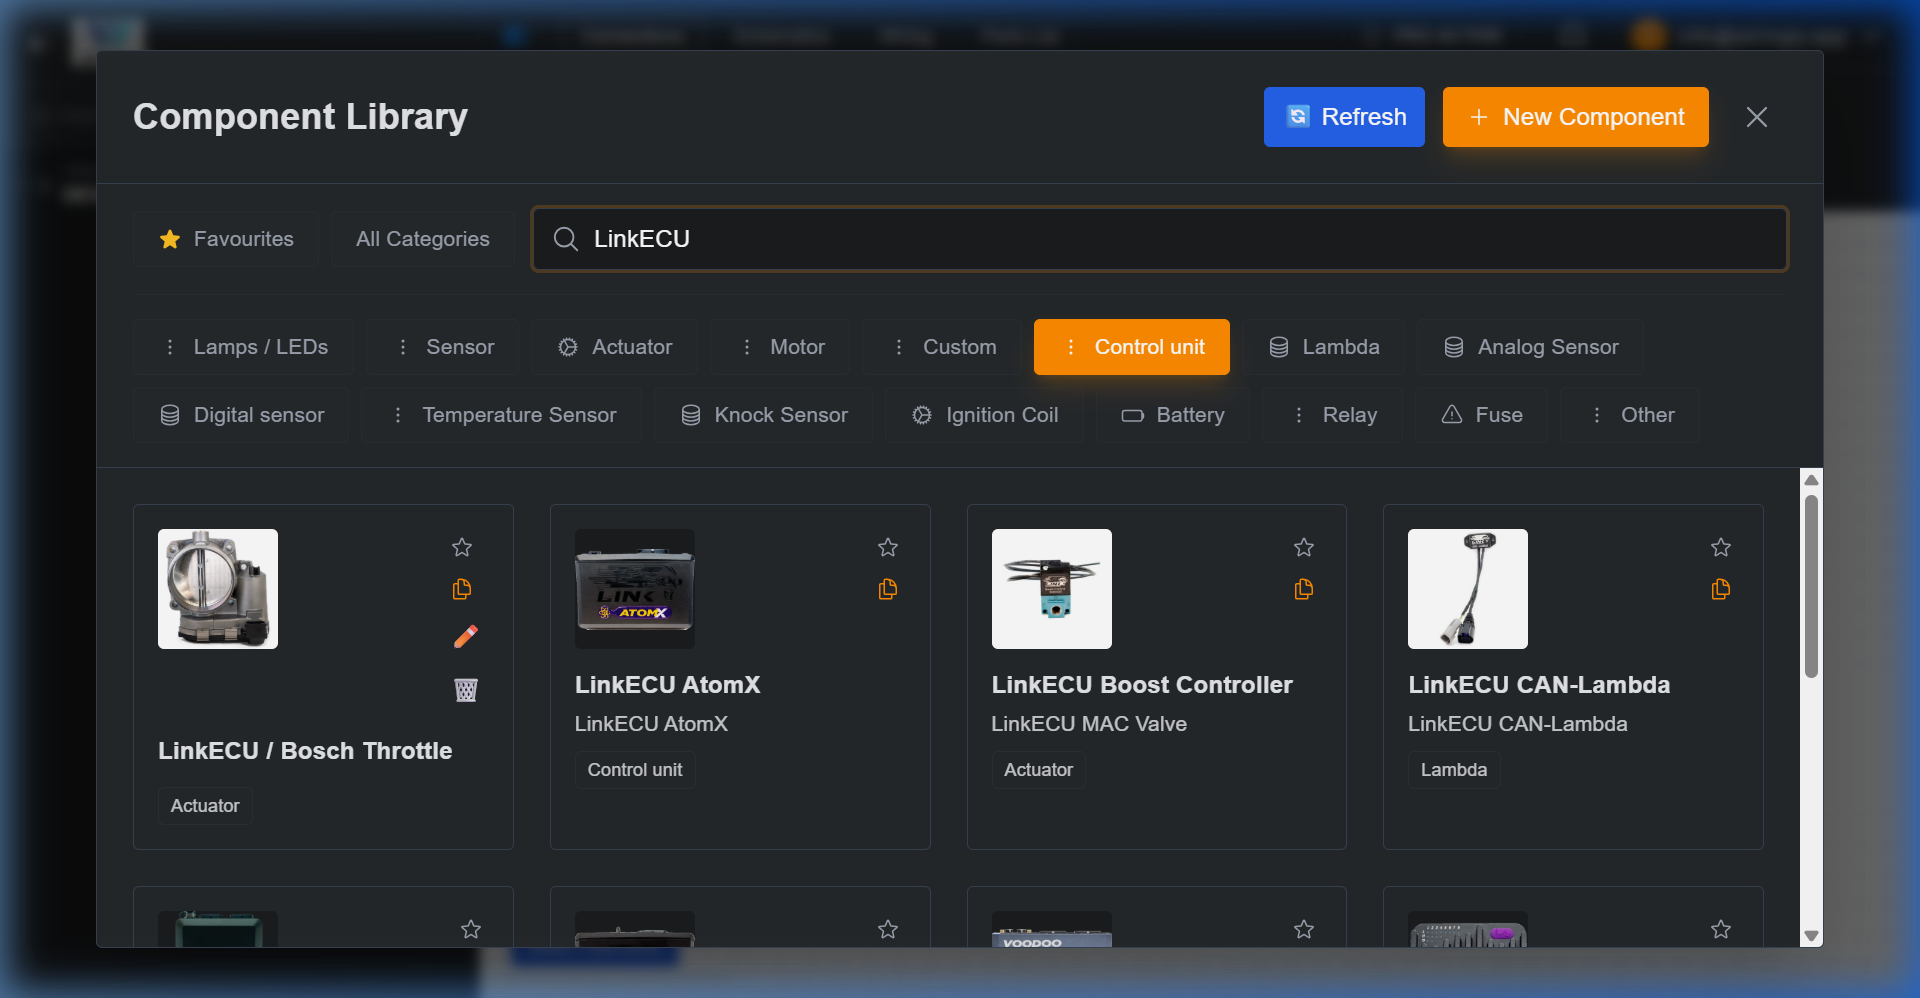 Component library with category filters and search tools.
Finding the Right Part
To keep your workflow fast, use the search and filtering tools at the top of the interface to find exactly what you need for your design.
Organization and Search
- Category Tabs: The library is organized into specific category tabs, allowing for quick navigation between different component types (e.g., Control Units, Sensors, Connectors).
- Favorites: The default view is the Favorites tab. You can mark frequently used components to easily access them without searching.
- Global Search: Use the search bar to find parts across all categories by name, part number, or brand (e.g., "Bosch", "Deutsch", or "MaxxECU").
- Always Up-to-Date: Click Refresh to see the latest additions to the global library.
- Favourites: Click the star icon on a component card to add it to your favorites. Click it again to remove it from your favorites. Add most commonly used components to your favourites to make your life easier.
Managing Your Components
Components are displayed as cards. Depending on who created the part, you have different options to make your life easier.
Your Personal Components
For parts you’ve created, you have full control via the icons in the top-right corner:
- Edit (Pencil Icon): Update technical specs, pinouts, or terminal details.
- Delete (Trash Icon): Remove parts you no longer need.
- Copy (Document Icon): Duplicate a part to create a variation quickly.
Using Admin Components
Components marked with Admin Access are read only parts created by the Wiringly team. That's just to make your life easier and starting faster.
- The "Copy & Tweak" Workflow: To modify an Admin part, just click the Copy (Document Icon). This creates your own personal version of the component that you can edit freely. For example if you are used to use certain colored wires for your ECU, you can copy the Admin part and change the wire colors to match your workflow. Then choose that component when creating a design on canvas and it will suggest the wire colors you set. For a random user maybe not so useful, but for someone who designs several harnesses it can be useful and make design faster in long run.
Adding New Components
If a specific part isn't in the library yet, adding it is simple. The more detail you add now, the more work Wiringly can automate for you later.
- Start New: Click the + New Component button.
- Pick a Category: Choose the type (e.g., Control Unit, Analog Sensor).
- Pro Tip: Selecting "Control Unit" enables smart wire color suggestions during the design phase.
- Add the Details: Give it a clear name (e.g., "Link AtomX") and a description.
- Physical Dimensions: Enter the exact Width and Length in millimeters. These values are critical because Wiringly uses a 1:1 scale on the canvas. If you set a component to 100mm x 60mm, it will take up exactly that much space on your final Formboard, ensuring your harness routing is physically accurate.
- Terminal Information: Take a moment to add terminal part numbers. This information flows directly into your Bill of Materials (BOM). You can add different terminal part numbers for each pin and different part numbers for terminals meant for different wire gauges.
- Visuals & Cropping: Upload an image and use the Polygon Cropping Tool to define the exact shape of your component.
- Polygon Masking: Click anywhere on the boundary lines to add new points. This allows you to create complex shapes for ECUs and sensors that aren't perfectly square.
- Edge Snapping: Points will automatically "snap" to the edges of the image (0%, 50%, 100%) or even to visual edges (pixel contrast) to help you trace parts with extreme precision.
- Workspace Navigation: Use your mouse wheel to zoom in for detail work and Spacebar + Drag to pan around the image.
- Visual Feedback: Snapped points turn green, giving you confidence in your trace.
- Save: Once saved, your new part is ready to be placed onto the canvas.
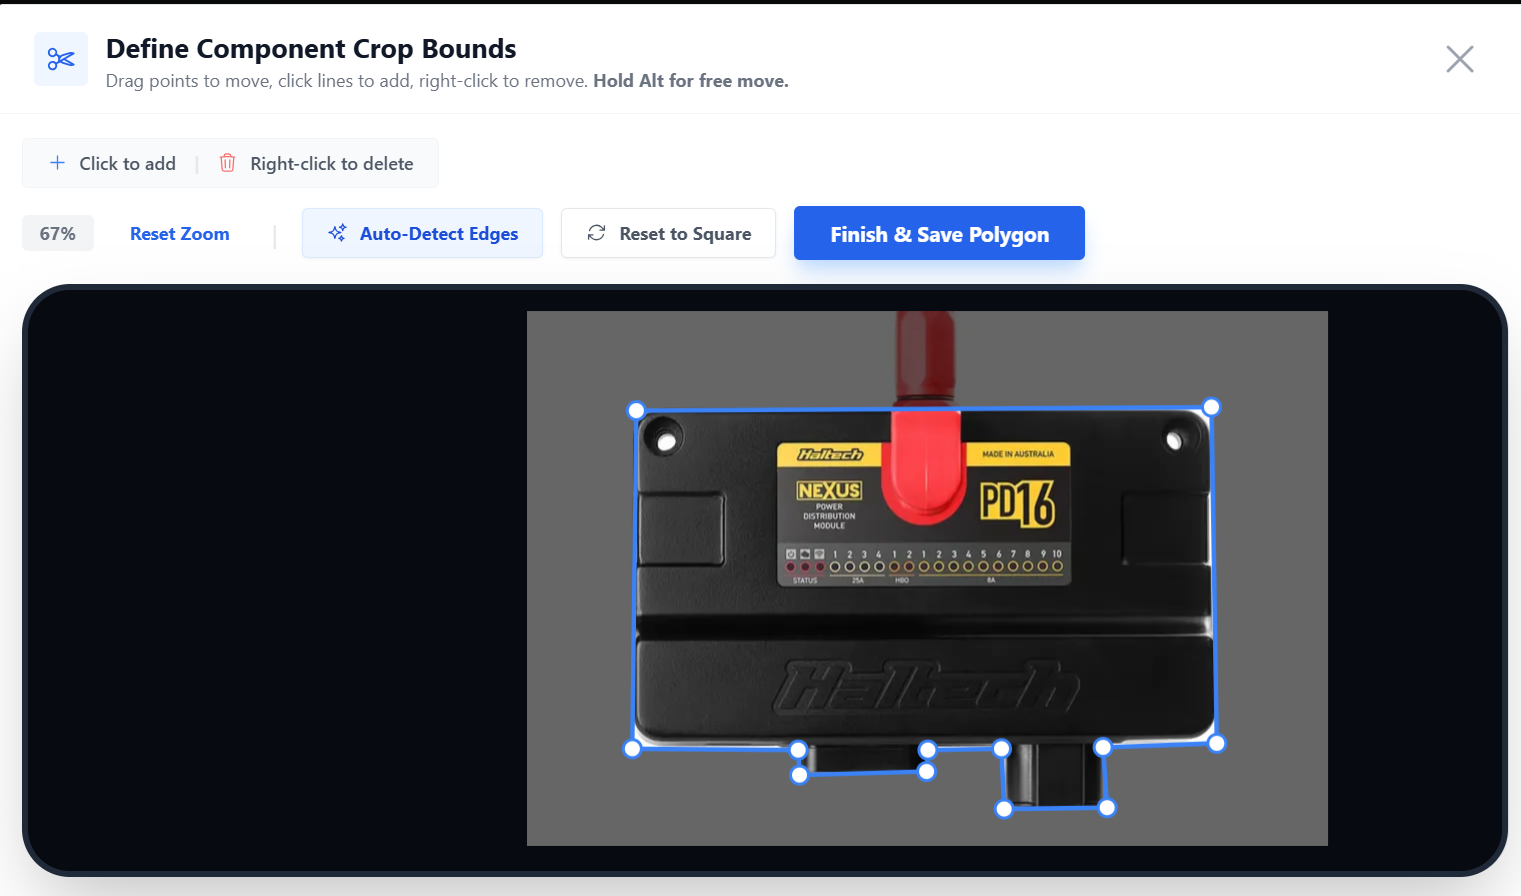 Defining a custom component mask with visual edge snapping.
Smart Pin Naming & Pattern Generator
For components with high pin counts, you can automatically generate all pin labels using the pattern tool:
- Pin Naming Patterns: Enter a rule to generate names in bulk:
- Grid/Matrix layouts: E.g.,
A1-B3will generate pins:A1, A2, A3, B1, B2, B3. - Letter Ranges: E.g.,
A-Hwill generate:A, B, C, D, E, F, G, H. - Specific Lists: E.g.,
A,B,Cwill generate exactly those names. - Numeric (Default): Leave empty to automatically name pins
1, 2, 3...up to your pin count.
- Grid/Matrix layouts: E.g.,
- Exclusions: Prevent naming confusion by excluding specific characters. For motorsport harnesses, this defaults to
I, Oto avoid mistaking them for1and0. - Interactive Preview: Click on any generated name pill inside the preview row to manually override its text. This is perfect for custom grounding, shield drain, or special labels.
Best Practices for a Smoother Build
- Be Specific: The more detailed your component data (like exact terminal numbers), the better your automated Bill of Materials will be.
- Leverage Descriptions: Descriptions are visible on the canvas. Use them for notes like "Coil 1" or "Main Ground" to keep your layout organized. You can edit these anytime on the canvas by right-clicking and selecting Edit Description.
- Don't Start from Scratch: Always look for a similar Admin component first. Copying and modifying is a lot faster than building a complex 100-pin ECU from zero.