Project Management
Managing Your Projects
The project dashboard allows you to organize your wiring harness designs and quickly access recent work.
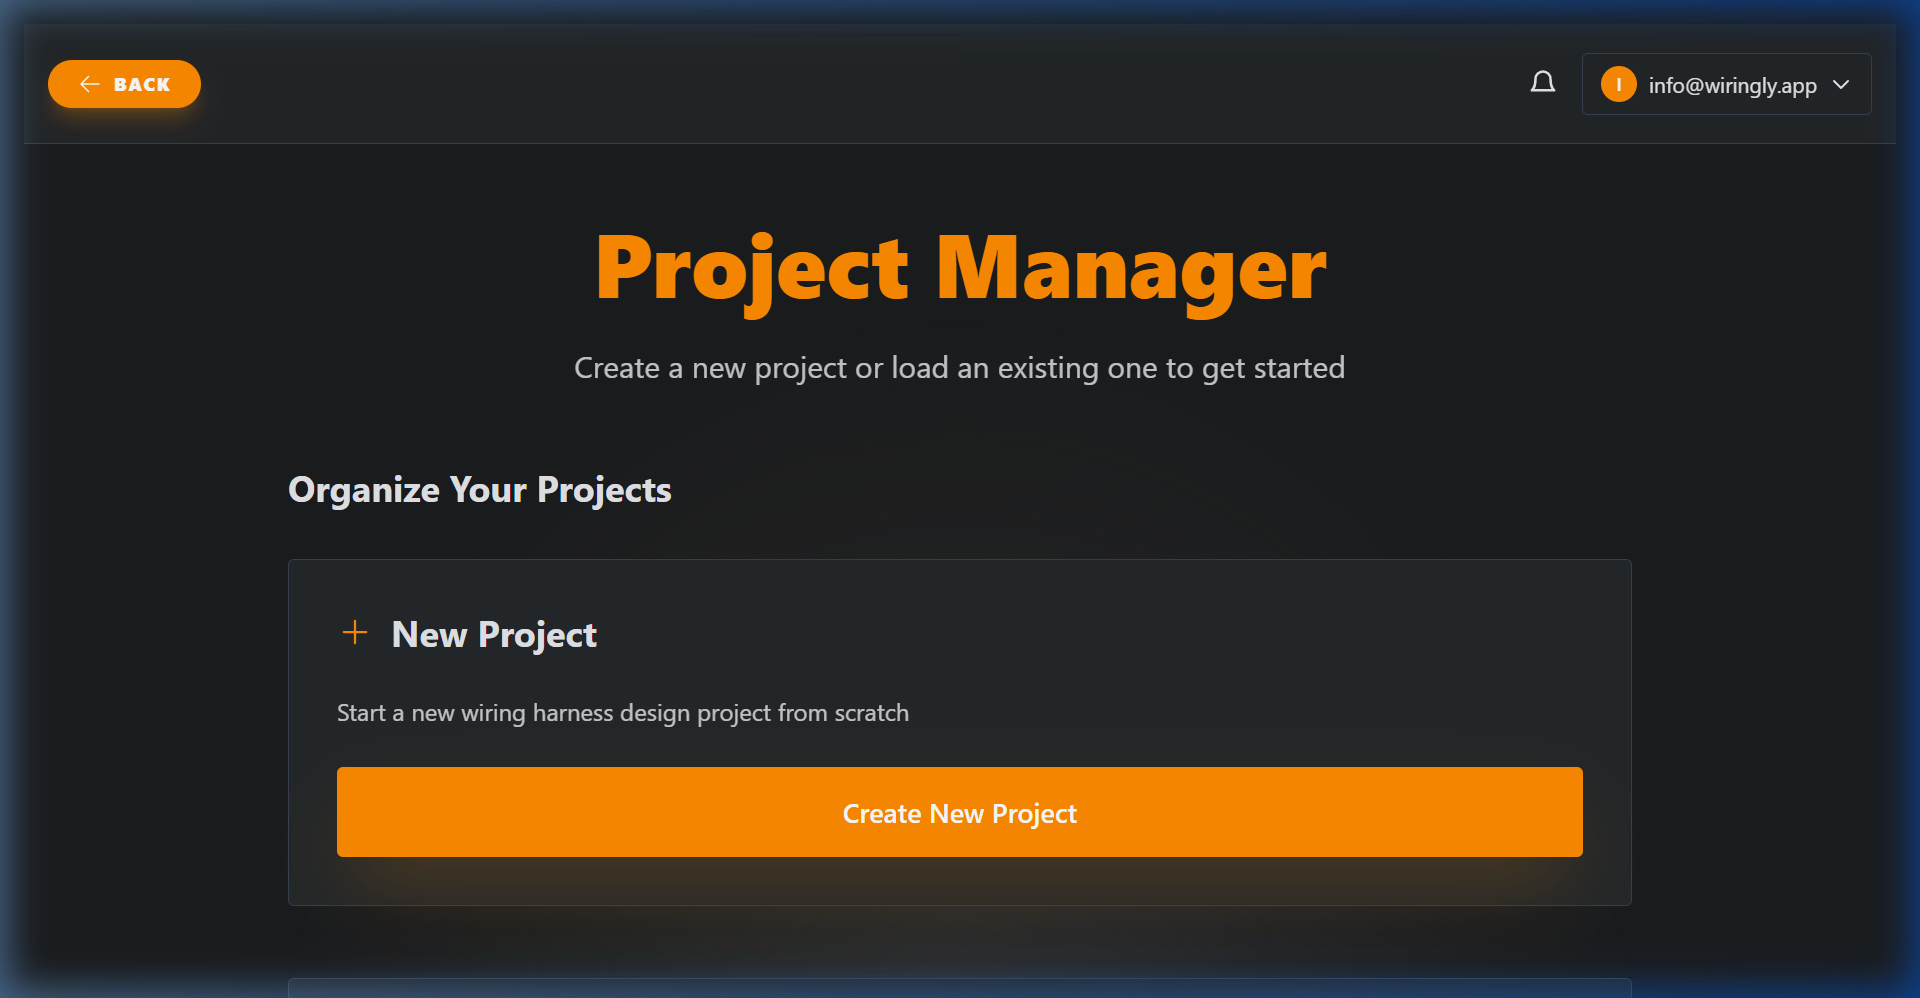 Project dashboard showing active projects and folders.
Project Actions
| Action | Description |
|---|---|
| Create New Project | Start a new wiring harness design project from scratch. |
| Open | Launch the editor for the selected project. |
| Edit | Modify the project's name and description. |
| Move to Folder | Organize your workspace by moving the project into a specific folder. |
| Copy | Create an identical duplicate of the project to use as a template or backup. |
| Delete | Permanently remove the project from your account. |
Creating a New Project
To start a new design, click the Create New Project button. This opens the project creation modal where you can define your project's identity:
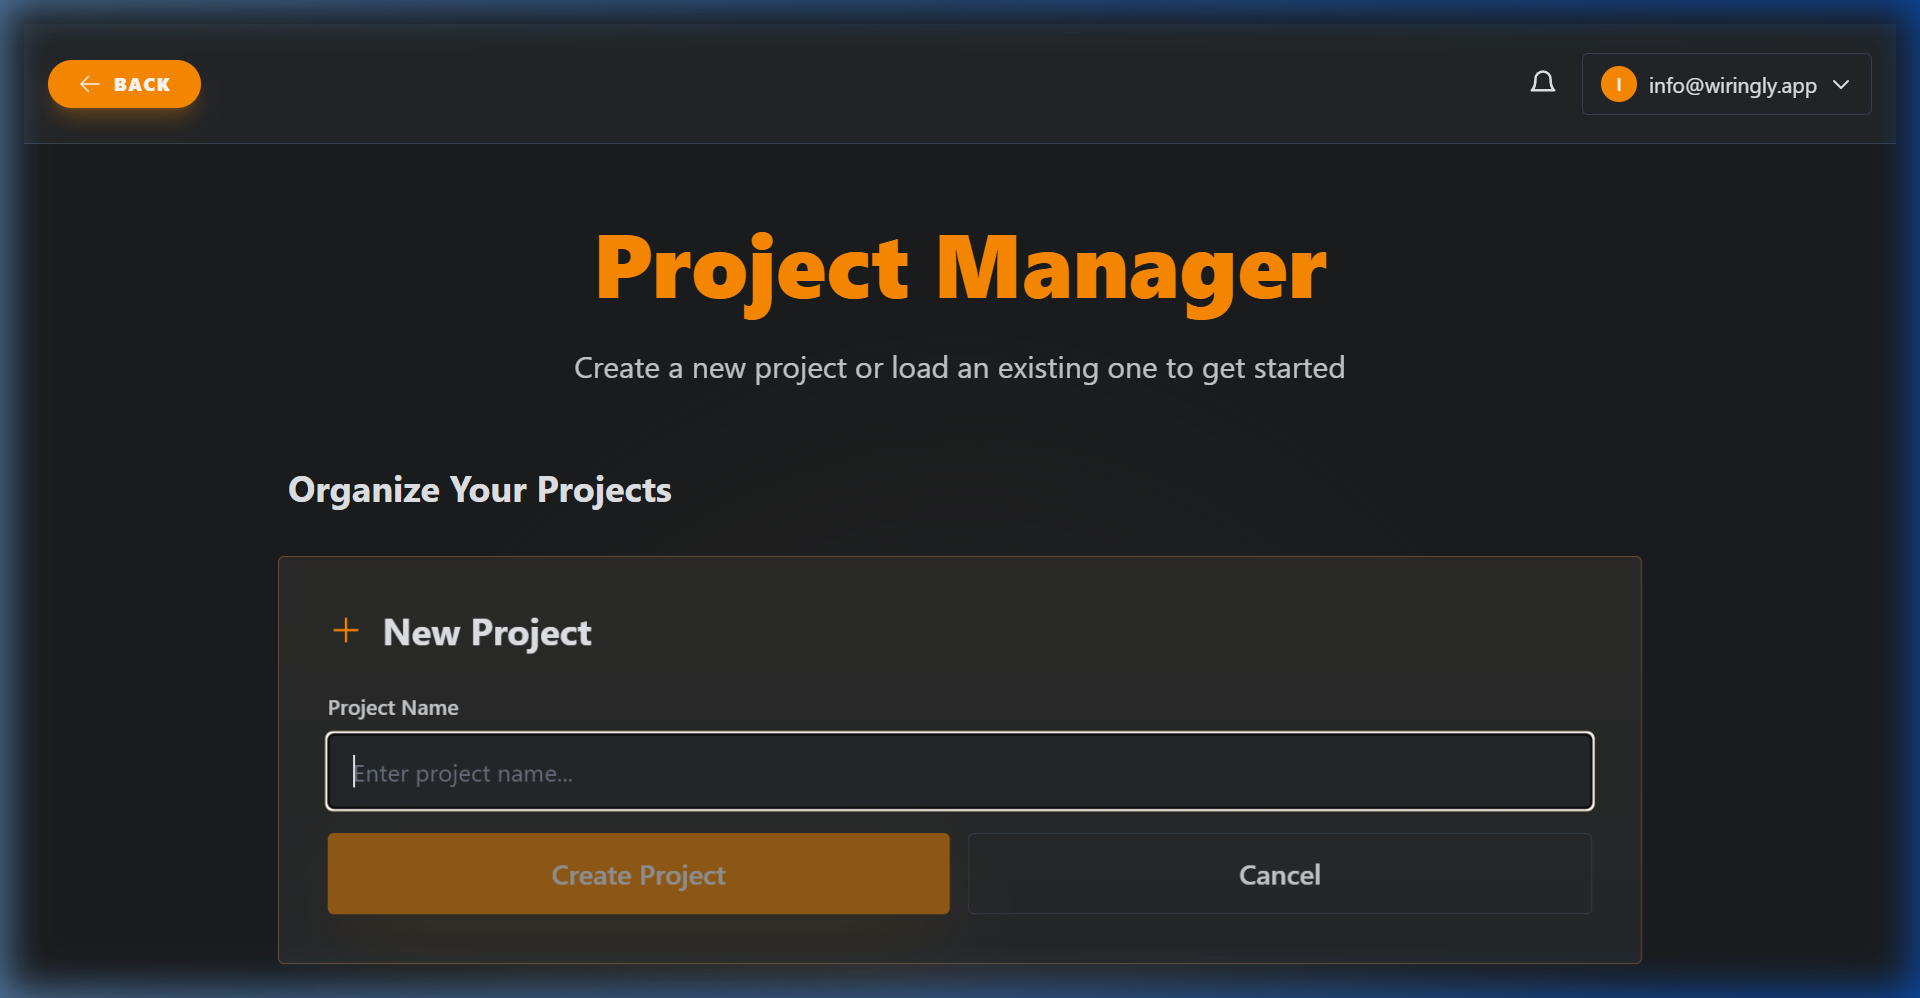 Project creation modal.
- Project Name: Give your project a clear, descriptive name (e.g., "Visual Manual Project").
- Description: (Optional) Add technical notes or customer details for better searchability later.
- Draft Mode: Toggle whether to start this as a draft iteration.
- Create: Click to enter the design canvas.
Deleting a project will remove all of its associated version history and data. This action cannot be undone.
Tips:
- Use Folders: Keep your dashboard clean by grouping projects by client or project type using the Move to Folder icon.
- Version Tracking: Keep an eye on the Version tag at the bottom of each project card to ensure you are working on the
Currentrelease.
If you are unsure what an icon does while using the app, simply hover your mouse over the button to see a quick tooltip description.
Quick Actions
While tooltips provide quick labels, the table below explains the specific utility of each action:
| Icon | Action | Description |
|---|---|---|
| Open | Open | Enter the editor to modify your design. |
 | Edit | Rename the project or update its description for better searchability. |
 | Move | Relocate the project into a specific folder. |
 | Copy | Create a "Save As" style duplicate to test new ideas without affecting the original. |
 | Delete | Permanently remove the project and its entire version history. |
Organizing with Folders
As your project list grows, use the Manage Folders feature to keep your workspace organized.
- Click the Manage Folders button in the top right of the "Recent Projects" section.
- Create new folders based on clients, harness types, or assembly stages.
- Use the Move to Folder icon on any project card to file it away.
Version Control
Versioning allows you to save specific designs. Making a simple sensor change, but still want to keep the old design? Just create a new version.
Viewing Version History
Click the history icon next to the Current tag on any project card to open the history panel.
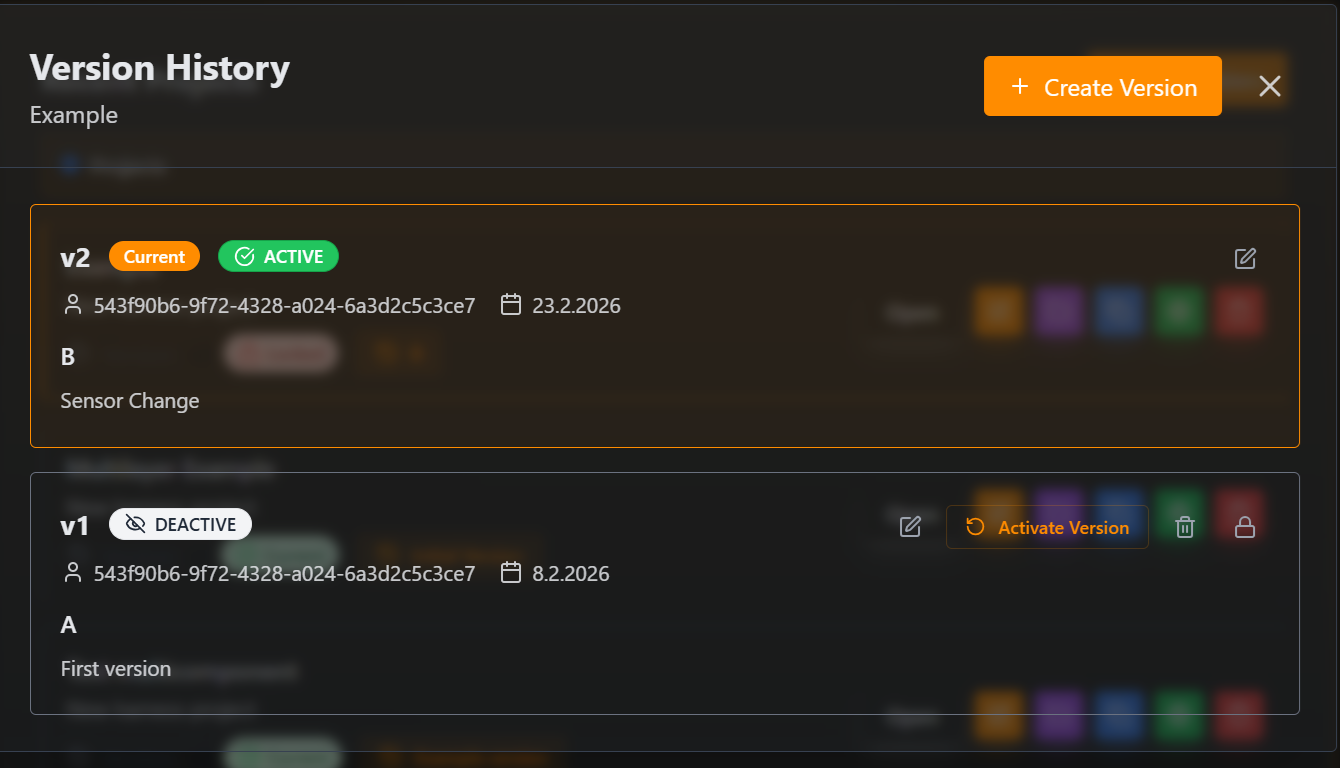 (Screenshot of Version History List)
- Version History: Displays a chronological list of all saved states.
- Status Tags: Look for the
Currenttag to identify the active production design. - Drafts: Versions marked as
DRAFTare work-in-progress iterations.
Creating a New Version
When you reach a milestone, click + Create Version.
(Screenshot of Create Version Modal to be added)
- Minor (e.g., 1.1): Use for small adjustments or "Wrong sensor" type fixes.
- Major (e.g., 2.0): Use for significant architecture changes or new harness generations.
Deleting a project is irreversible and will delete every version associated with it.